Gå til hovedindhold

Hvordan indsættes en tom ny række automatisk ved hjælp af Command Button i Excel?

I mange tilfælde skal du muligvis indsætte en tom ny række i en bestemt position på dit regneark. I denne artikel viser vi dig, hvordan du automatisk indsætter en tom ny række ved at klikke på en kommandoknap i Excel.

Indsæt automatisk en tom ny række ved hjælp af kommandoknappen


Indsæt automatisk en tom ny række ved hjælp af kommandoknappen

Du kan køre følgende VBA-kode for at indsætte en tom ny række ved at klikke på en kommandoknap. Gør som følger.

1. For det første skal du indsætte en kommandoknap. Klik venligst Udvikler > indsatte > Kommando-knap (ActiveX-kontrol). Se skærmbillede:

2. Træk derefter en kommandoknap til det regneark, du skal tilføje nye rækker, højreklik på kommandoknappen og klik Ejendomme fra højreklikmenuen.

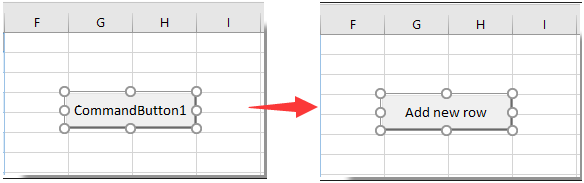
3. i Ejendomme dialogboksen, skal du indtaste den viste tekst på kommandoknappen i Caption under boksen kategoriseret fanen, og luk derefter dialogboksen.

Du kan se den viste tekst på kommandoknappen ændres som vist nedenstående skærmbillede.

4. Højreklik på kommandoknappen igen, og klik derefter på Vis kode fra højreklikmenuen.

5. Derefter Microsoft Visual Basic til applikationer vindue, skal du udskifte den originale kode med nedenstående VBA-kode i Kode vindue.

VBA-kode: Indsæt automatisk tom ny række ved hjælp af kommandoknappen

Private Sub CommandButton1_Click()
    Dim rowNum As Integer
    On Error Resume Next
    rowNum = Application.InputBox(Prompt:="Enter Row Number where you want to add a row:", _
                                    Title:="Kutools for excel", Type:=1)
    Rows(rowNum & ":" & rowNum).Insert Shift:=xlDown
End Sub

Bemærk: I koden er CommanButton1 navnet på den kommandoknap, du har oprettet.

6. Trykke andre + Q taster samtidigt for at lukke Microsoft Visual Basic til applikationer vindue. Og sluk for Design Mode under Udvikler fane.

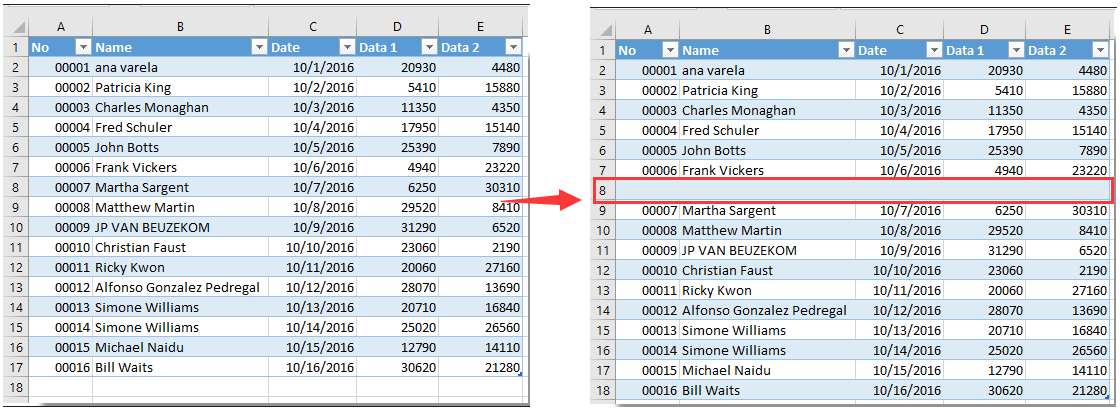
7. Klik på den indsatte kommandoknap og a Kutools til Excel dialogboksen vises. Indtast et bestemt række nummer, hvor du vil tilføje en tom ny række, og klik derefter på OK knap. Se skærmbillede:

Derefter indsættes den tomme nye række i en bestemt position på dit regneark som vist nedenstående skærmbillede. Og det holder celleformateringen af ​​ovenstående celle.


Relaterede artikler:

Bedste kontorproduktivitetsværktøjer

🤖 Kutools AI Aide: Revolutionér dataanalyse baseret på: Intelligent udførelse   |  Generer kode  |  Opret brugerdefinerede formler  |  Analyser data og generer diagrammer  |  Aktiver Kutools funktioner...
Populære funktioner: Find, fremhæv eller identificer dubletter   |  Slet tomme rækker   |  Kombiner kolonner eller celler uden at miste data   |   Runde uden formel ...
Super opslag: VLookup med flere kriterier    Multiple Value VLookup  |   VOpslag på tværs af flere ark   |   Fuzzy Lookup ....
Avanceret rulleliste: Opret hurtigt rulleliste   |  Afhængig rulleliste   |  Multivælg rulleliste ....
Column Manager: Tilføj et bestemt antal kolonner  |  Flyt kolonner  |  Skift synlighedsstatus for skjulte kolonner  |  Sammenlign områder og kolonner ...
Fremhævede funktioner: Grid fokus   |  Designvisning   |   Stor Formel Bar    Arbejdsbog & Ark Manager   |  Ressourcebibliotek (Autotekst)   |  Datovælger   |  Kombiner regneark   |  Krypter/Dekrypter celler    Send e-mails efter liste   |  Superfilter   |   Specielt filter (filter fed/kursiv/gennemstreget...) ...
Top 15 værktøjssæt12 tekst Værktøjer (tilføje tekst, Fjern tegn, ...)   |   50 + Chart Typer (Gantt kort, ...)   |   40+ Praktisk formler (Beregn alder baseret på fødselsdag, ...)   |   19 Indsættelse Værktøjer (Indsæt QR-kode, Indsæt billede fra sti, ...)   |   12 Konvertering Værktøjer (Tal til ord, Valutaomregning, ...)   |   7 Flet og del Værktøjer (Avancerede kombinere rækker, Opdel celler, ...)   |   ... og mere

Overlad dine Excel-færdigheder med Kutools til Excel, og oplev effektivitet som aldrig før. Kutools til Excel tilbyder over 300 avancerede funktioner for at øge produktiviteten og spare tid.  Klik her for at få den funktion, du har mest brug for...

Beskrivelse


Fanen Office bringer en grænseflade til et kontor med Office, og gør dit arbejde meget lettere

  • Aktiver redigering og læsning af faner i Word, Excel, PowerPoint, Publisher, Access, Visio og Project.
  • Åbn og opret flere dokumenter i nye faner i det samme vindue snarere end i nye vinduer.
  • Øger din produktivitet med 50 % og reducerer hundredvis af museklik for dig hver dag!
Comments (26)
No ratings yet. Be the first to rate!
This comment was minimized by the moderator on the site
Bedankt voor je uitleg. Ik heb de formule toegepast maar bekom dat ik maar 1 lijn kan toevoegen. Daarna laat de knop het niet meer toe en moet ik eerst mijn toegevoegde rij verwijderen. Is er een manier om dit aan te passen?
This comment was minimized by the moderator on the site
Is there a way to make to row inset always below the last entry?
This comment was minimized by the moderator on the site
How do I do the opposite of this and create a button that will delete a row?
This comment was minimized by the moderator on the site
Hi Big Ant,

Here's the modified code to delete a specified row when the Command Button is clicked:


Private Sub CommandButton1_Click()
'Updated by Extendoffice 20230817
    Dim rowNum As Integer
    On Error Resume Next
    rowNum = Application.InputBox(Prompt:="Enter Row Number which you want to delete:", _
                                    Title:="Kutools for excel", Type:=1)
    If rowNum <> 0 Then
        Rows(rowNum).Delete Shift:=xlUp
    End If
End Sub
This comment was minimized by the moderator on the site
Criei uma linha e nomeei como spotB,
Mudei a altura da linha para 0,01 para ocultá-la (apenas por estética).
Criei um botão:
Application.Goto Reference:="spotB"
Selection.EntireRow.Insert

Problema resolvido.

Obrigado pelos códigos a Mah e crystal, mas eu tinha 8 títulos para separar, cada um inserindo linhas quando necessário ao usuário, e não queria nenhuma pergunta sobre quantidade de linhas, os usuários não leem perguntas e clicam logo em OK, depois reclamam...
This comment was minimized by the moderator on the site
... Testei os códigos acima, mas, como se trata de pessoas que vão usar, não é viável os box que pedem a linha e a quantidade, não dá...
This comment was minimized by the moderator on the site
Caros colegas, após pesquisar (bastante) na net não consegui encontrar um atalho, comando, código, nada, nada, que eu possa usar para inserir em uma macro APENAS uma forma de inserir uma linha ABAIXO da célula ativa. Isto porquê se eu gravar o endereço da célula, ele não muda, fica sempre na mesma célula e as seguintes não vão ficar corretamente abaixo, e se eu usar um endereço de célula fixo, a linha tem que ser inserida acima, mas não formata da forma desejada, que seria o formato das linhas de cima.

Acho que o código existe, só não encontro, já tentei várias formas, selecionando um fixo, subindo uma linha e pedindo para inserir após, mas as seguintes não funcionam de acordo.

Alguém poderia me ajudar?
This comment was minimized by the moderator on the site
Hi

I used the code but wanted to add rows with formulas, therefore I added the last line to be able to add the rows with formulas.
However, in my excel file and in column "F" I have a text which can be entered manually and would be different in different cases. Therefore, I would like to add rows below the reference row with keeping the formulas and values in all cells except the cell from column "F" which I would like to be copied as blank!
Could you please help me with what should I add to the underneath code to be able to have the cells of column "F" blank whenever I add a row with this code?
thanks in advance!

Private Sub CommandButton1_Click()
Dim xIntRrow As Integer
Dim rowNum As Integer
On Error Resume Next
rowNum = Application.InputBox(Prompt:="Enter Row Number where you want to add a row:", _
Title:="Kutools for excel", Type:=1)
xIntRrow = Application.InputBox(Prompt:="Type in the number of rows you want to insert", _
Title:="Kutools for excel", Type:=1)
Rows(rowNum + 1 & ":" & rowNum + 1).EntireRow.Resize(xIntRrow).Insert Shift:=xlShiftDown
Rows(rowNum).Resize(xIntRrow + 1).FillDown

End Sub
This comment was minimized by the moderator on the site
Hi Mah,
The following VBA code may do you a favor. Please give it a try. Thank you.

Private Sub CommandButton1_Click()
'Updated by Extendoffice 20220707
    Dim rowNum As Integer
    Dim xRg1, xRg2 As Range
    
    On Error Resume Next
    
    rowNum = Application.InputBox(Prompt:="Enter Row Number where you want to add a row:", _
                                    Title:="Kutools for excel", Type:=1)
    
    Rows(rowNum & ":" & rowNum).Insert Shift:=xlDown
    Rows((rowNum - 1) & ":" & (rowNum - 1)).Copy
    Rows(rowNum & ":" & rowNum).Select
    Selection.PasteSpecial Paste:=xlPasteAll, Operation:=xlNone, SkipBlanks:= _
        False, Transpose:=False
    Range("F" & rowNum).Value = ""
End Sub
This comment was minimized by the moderator on the site
Sub AddNewRow()


Private Sub CommandButton1_Click()

ActiveSheet.Unprotect Password:="1234"


Dim mySheets

Dim i As Long


mySheets = Array("Sheet2")


For i = LBound(mySheets) To UBound(mySheets)

With Sheets(mySheets(i))

.Range("B10").EntireRow.Insert Shift:=xlDown

.Range("B10:H10").Borders.Weight = xlThin

End With

Next i


ActiveSheet.Protect Password:="1234"


End Sub

I don't know if this will work for you. It worked quite well for me. I even left unprotected cells that you can input data and the formulas are still active. Took me a whole day to figure it out. replace "1234" with whatever password you feel like, "Sheet2" with the Sheet you are working with and input the range you want.
The code first unprotects the worksheet, adds row and protects the worksheet.
This comment was minimized by the moderator on the site
is it possible to create in a different sheet? I really need that
This comment was minimized by the moderator on the site
can possible insert multiple sheet row at one time click by this .
This comment was minimized by the moderator on the site
Hi,
The below code can help you solve the problem. Please have a try.

Private Sub CommandButton1_Click()
Dim xIntRrow As Integer
Dim rowNum As Integer
On Error Resume Next
rowNum = Application.InputBox(Prompt:="Enter Row Number where you want to add a row:", _
Title:="Kutools for excel", Type:=1)
xIntRrow = Application.InputBox(Prompt:="Type in the number of rows you want to insert", _
Title:="Kutools for excel", Type:=1)
Rows(rowNum + 1 & ":" & rowNum + 1).EntireRow.Resize(xIntRrow).Insert Shift:=xlShiftDown

End Sub
There are no comments posted here yet
Load More
Please leave your comments in English
Posting as Guest
×
Rate this post:
0   Characters
Suggested Locations