Gå til hovedindhold

Hvordan kopieres en aftale til en anden dag i Outlook-kalenderen?

I Outlooks kalender forsøgte jeg at kopiere en aftale til en anden dag ved at kopiere og indsætte. Imidlertid blev kun emnets emne kopieret som vist nedenstående skærmbillede. Men jeg har brug for at kopiere hele aftalen undtagen start- / slutdato, nogen ideer?


Kopier en aftale til en anden dag i Outlook-kalenderen med Ctrl-tasten

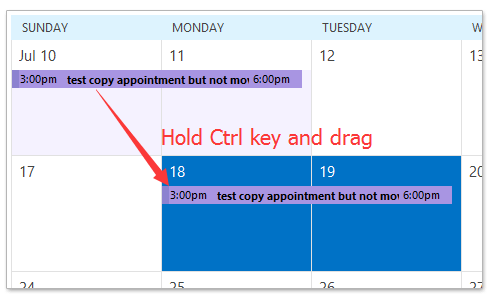
I Kalender visning af Outlook, skal du vælge den aftale, du vil kopiere, trække den til en anden dag med nede Ctrl tasten, og slip derefter musen.

Og nu kopieres den valgte aftale nøjagtigt til en anden dag undtagen dens startdato og slutdato. Se skærmbillede:


Kopier en aftale til en anden dag i Outlook-kalenderen med musens højre knap

I Kalender visning af Outlook, træk aftalen ved at holde den højre museknap nede, slip musen indtil den angivne dag, du vil kopiere til, og vælg derefter Kopi fra poppet ud genvejsmenuen. Se skærmbillede:

Og nu kopieres aftalen til den angivne dag i kalenderen i Outlook. Se skærmbillede:

Videresend automatisk hver e-mail til den angivne modtager i Outlook

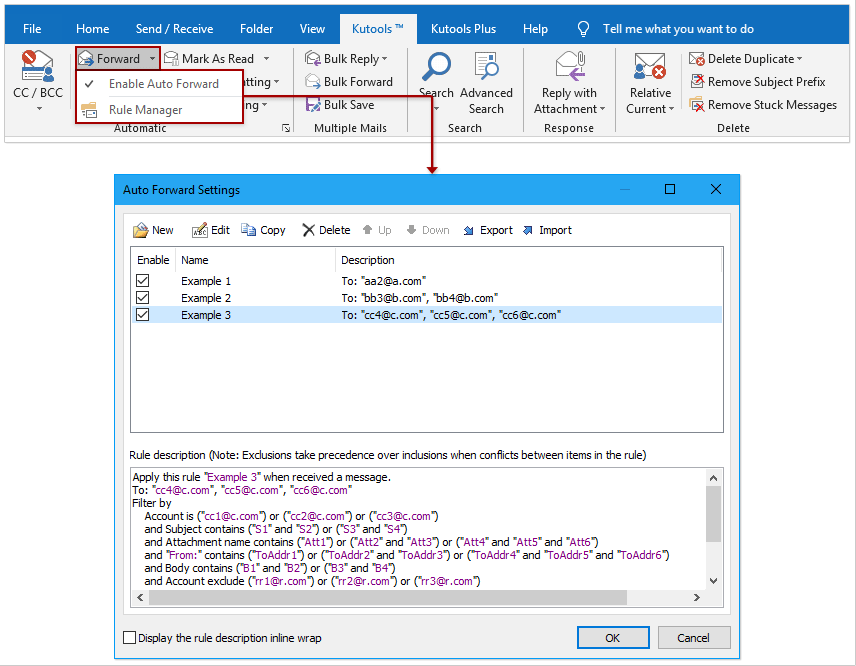
Generelt kan vi indstille en regel til automatisk at videresende e-mails til de angivne modtagere, såsom din anden e-mail-konto, din Gmail eller dine kolleger osv. Men alt hvad vi ved, det tager lang tid at konfigurere en brugerdefineret regel i Outlook. Nu introducerer vi Kutools til Outlook (Automatisk) Videresend funktion, som kun kan indstille en regel til automatisk videresendelse med flere klik.


automatisk videresendelse af e-mails

Relaterede artikler


Bedste kontorproduktivitetsværktøjer

Kutools til Outlook - Over 100 kraftfulde funktioner til at superlade din Outlook

🤖 AI Mail Assistant: Øjeblikkelige pro-e-mails med AI-magi – et klik for geniale svar, perfekt tone, flersproget beherskelse. Forvandl e-mailing ubesværet! ...

📧 Email Automation: Ikke til stede (tilgængelig til POP og IMAP)  /  Planlæg Send e-mails  /  Auto CC/BCC efter regler ved afsendelse af e-mail  /  Automatisk videresendelse (avancerede regler)   /  Tilføj automatisk hilsen   /  Opdel automatisk e-mails med flere modtagere i individuelle meddelelser ...

📨 Email Management: Genkald nemt e-mails  /  Bloker svindel-e-mails af emner og andre  /  Slet duplikerede e-mails  /  Avanceret søgning  /  Konsolider mapper ...

📁 Vedhæftede filer ProBatch Gem  /  Batch adskilles  /  Batch komprimere  /  Automatisk gem   /  Automatisk afmontering  /  Automatisk komprimering ...

🌟 Interface Magic: 😊 Flere smukke og seje emojis   /  Boost din Outlook-produktivitet med fanebaserede visninger  /  Minimer Outlook i stedet for at lukke ...

👍 Wonders med et enkelt klik: Besvar alle med indgående vedhæftede filer  /   Anti-phishing e-mails  /  🕘Vis afsenderens tidszone ...

👩🏼‍🤝‍👩🏻 Kontakter og kalender: Batch Tilføj kontakter fra udvalgte e-mails  /  Opdel en kontaktgruppe til individuelle grupper  /  Fjern fødselsdagspåmindelser ...

Over 100 Features Afvent din udforskning! Klik her for at finde mere.

Læs mere       Gratis download      Køb


Comments (12)
Rated 5 out of 5 · 1 ratings
This comment was minimized by the moderator on the site
Muito obrigado! Funciona e é simples e rápido de fazer. A explicação com as imagens ajudou muito.
Rated 5 out of 5
This comment was minimized by the moderator on the site
I was able to follow Bethanne's comments and was successful after cursing MS on this for months. THANKS! "Find your folders pane. Mine is on the left of the screen and shows just two months over the list of folders. One can resize the folders pane to reveal more months. There's a border between the folders pane and the main calendar view. Hover over that border and your cursor arrow changes to the column resize icon. Now drag the border over to make the folders pane bigger and the main view smaller. More months will appear in the folders pane." Then, follow the suggestion to hold CTRL to copy while dragging the appointment you want to duplicate to the new callendar location, and DROP it.
This comment was minimized by the moderator on the site
On the left side of your screen should be a folder pane. Open and pin it to stay open, if it is not already. Click on the date of the appointment/meeting you want to copy. Then find the date in the control pane you want to copy the appointment/meeting to. Hold the ctrl button while clicking on the date(s) you want to copy to. All chosen date should appear on your screen. Then you can use the drag and drop with right click on the mouse, or hold ctrl while drag & dropping to the next date(s).
This comment was minimized by the moderator on the site
On my machine, any of the copy-paste methods (inc. ctrl+c, ctrl+v) do not copy the reminder - the one thing that definitely should be copied!
This comment was minimized by the moderator on the site
Thank you, thank you, thank you for posting this!
This comment was minimized by the moderator on the site
On a Macintosh computer, you hold down the Option key, then click and drag the item to a different day.
This comment was minimized by the moderator on the site
Copying the appointment by dragging doesn't work if the target date is not visible on the screen. The calendar does not scroll while you are dragging the appointment.
This comment was minimized by the moderator on the site
Hi,
Here is a workaround may help you.
Drag to copy the appointment to any one date close to the target appointment, and then modify the start date and end date of the new appointment.
Hope it helpful!
This comment was minimized by the moderator on the site
Agree, this is what I am trying to do as well. Anyone found a solution?
This comment was minimized by the moderator on the site
Did you find an answer for this, Guy? I need to know the very same thing.
This comment was minimized by the moderator on the site
Sandra's got the right answer, but I'll be more specific: Find your folders pane. Mine on the left of the screen and shows just two months over the list of folders. One can resize the folders pane to reveal more months. There's a border between the folders pane and the main calendar view. Hover over that border and your cursor arrow changes to the column resize icon. Now drag the border over to make the folders pane bigger and the main view smaller. More months will appear in the folders pane. It drove me absolutely crazy until I figured this out.
This comment was minimized by the moderator on the site
where you can view multiple months on the side or wherever you position them, you can view more than a year's worth if you click and drag the dragger* (sorry i don't know the correct term) you can then right-click your calendar invite, drag & drop it onto any day you choose
There are no comments posted here yet
Please leave your comments in English
Posting as Guest
×
Rate this post:
0   Characters
Suggested Locations